Aviva
The following guidance is specifically designed for users who have registered with Aviva for their AE qualifying pension scheme.
Please note: this guide should only be used after setting up your pension scheme with Aviva.
1. Selecting your Duties Start Date in BrightPay
a) To select your duties start date in BrightPay, click Pensions > Automatic Enrolment
b) Choose the statement that applies to you:
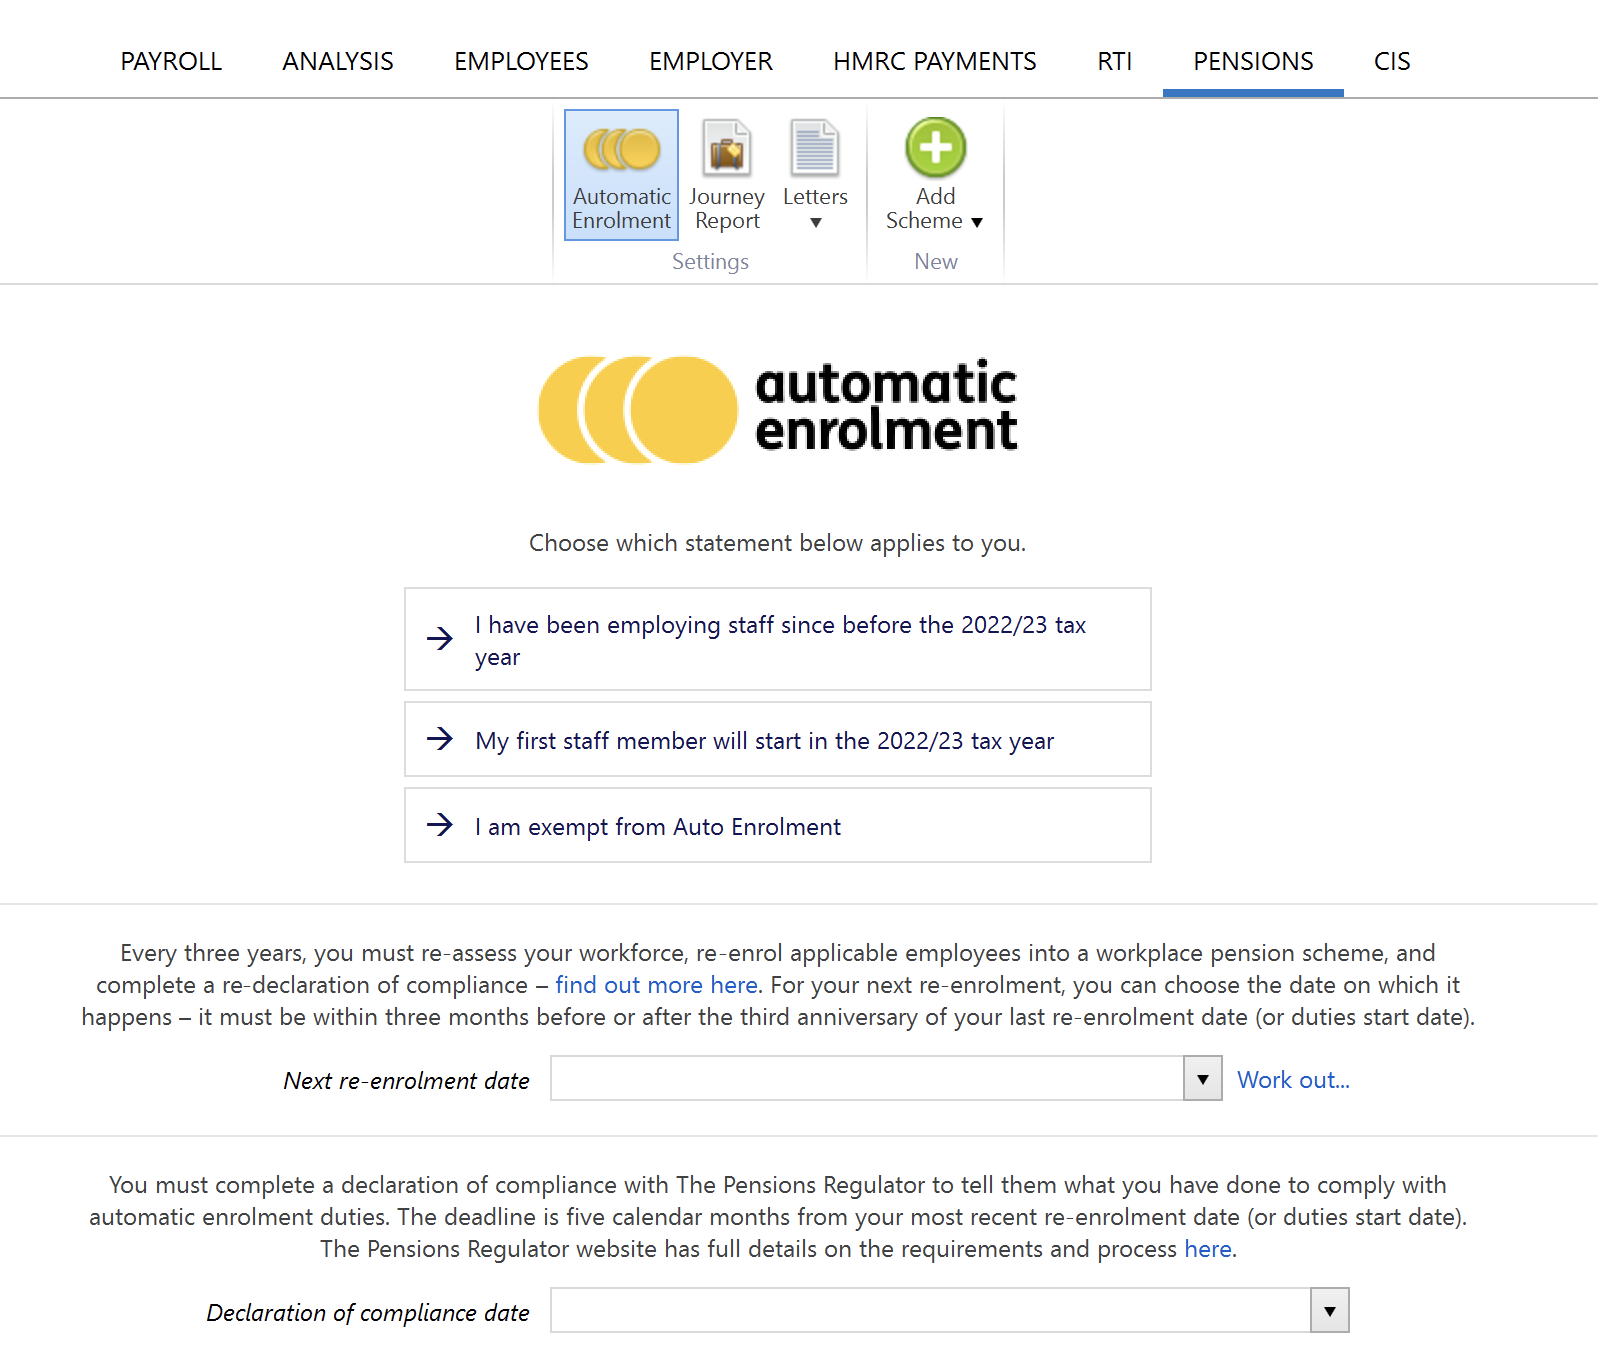
c) Click Save
2. Entering your Aviva Pension Scheme in BrightPay
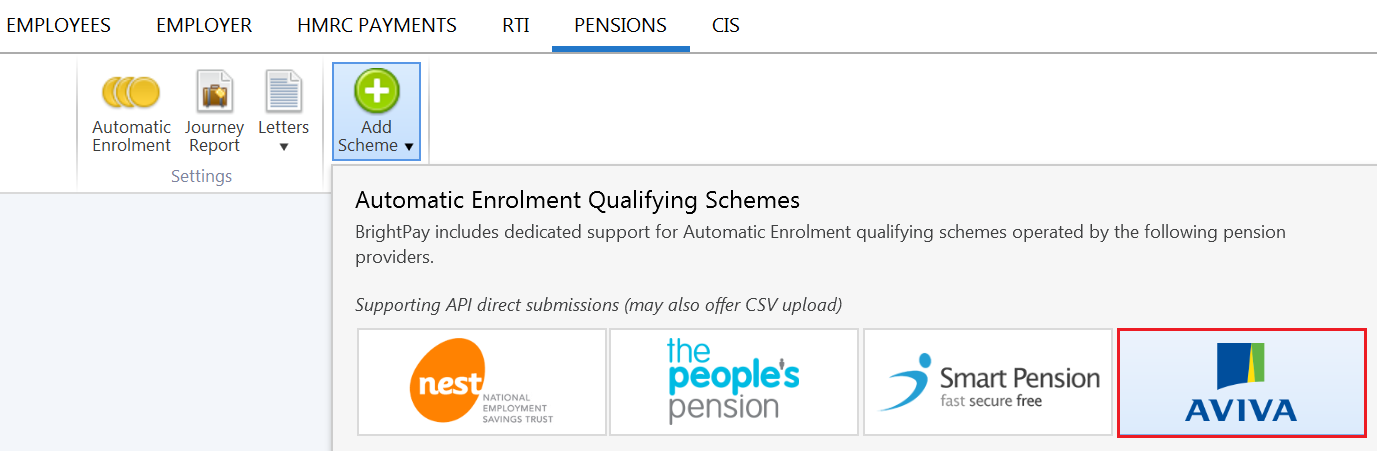
a) Click Pensions > Add New Scheme > followed by Aviva
Please note: when entering your Aviva pension scheme details in BrightPay, care should be taken that details entered in BrightPay match exactly to how they are set up in your Aviva online account (taking into account upper and lower casing). This is to ensure that enrolment and contribution submissions will submit successfully for you.
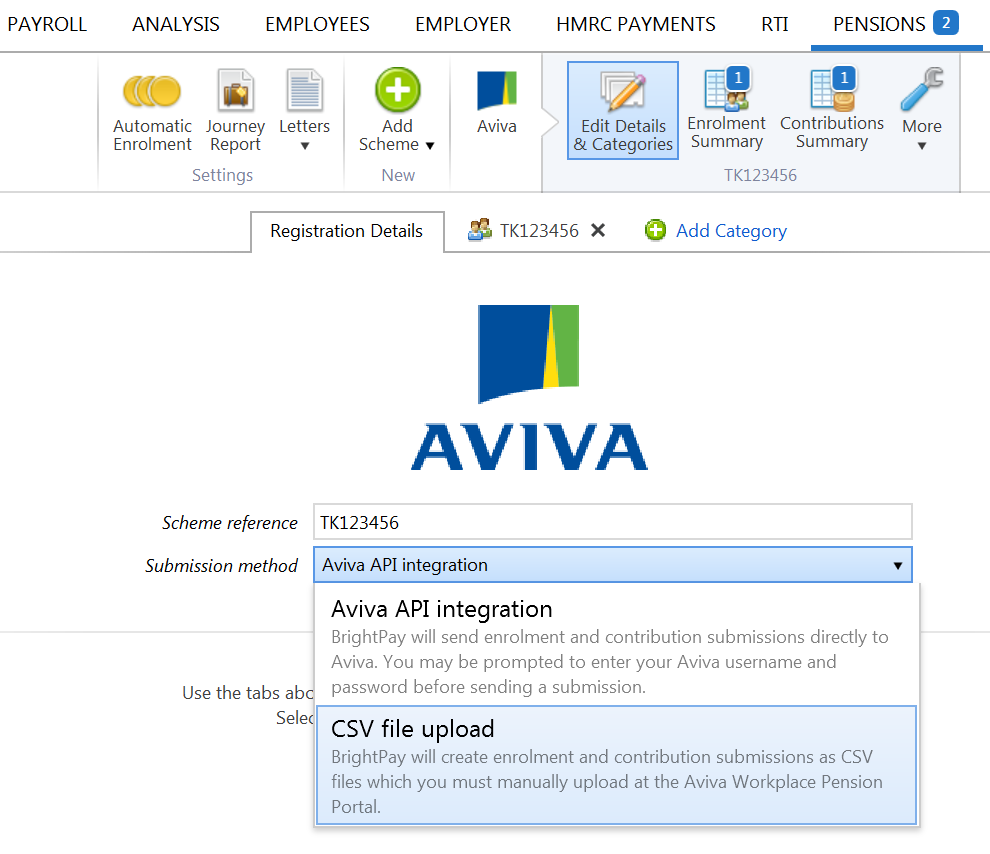
b) Within Registration Details enter your scheme reference in the field provided. This will have been given to you by Aviva when you completed their setup process.
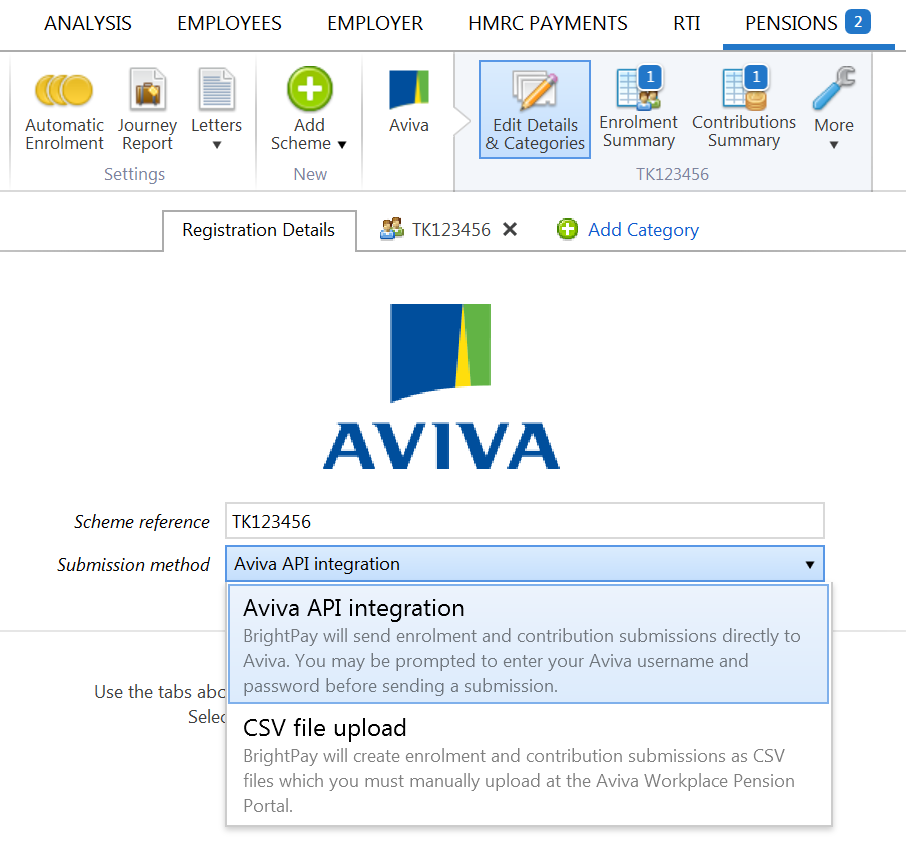
c) Select your pension data submission method using the drop-down menu: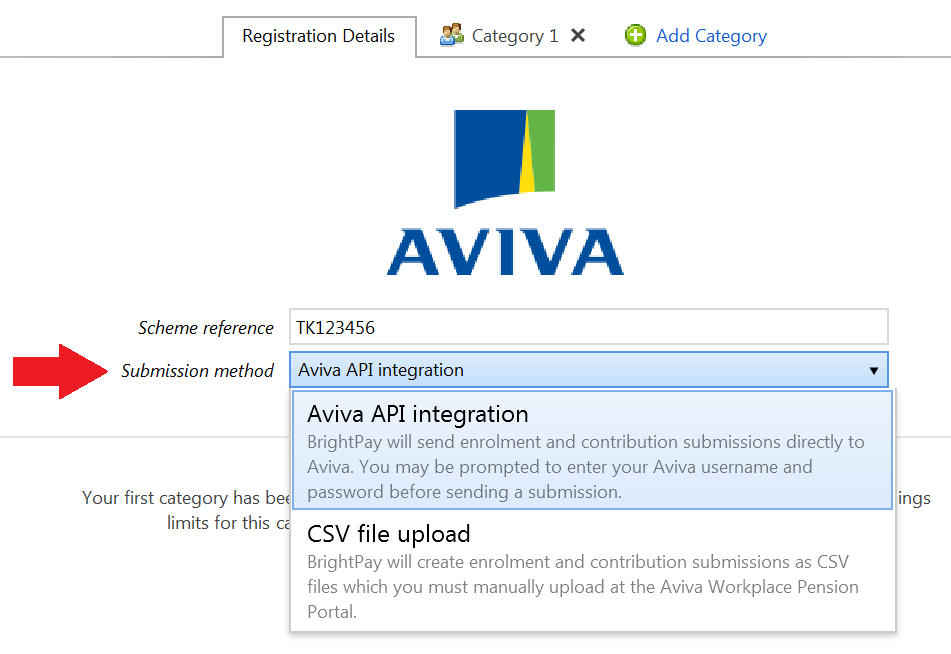
d) On the next tab, enter your Category ID. 
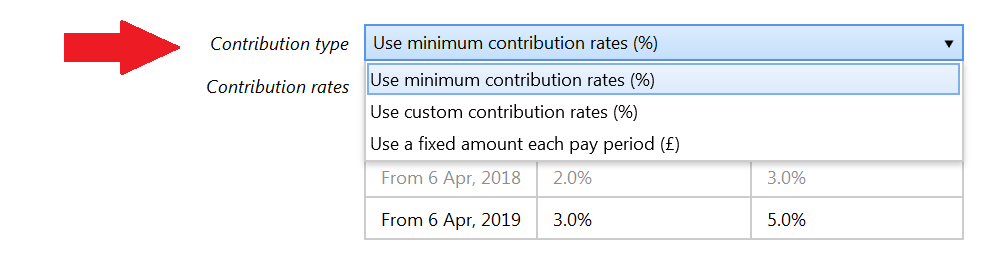
e) Select the Contribution Type that is to apply by clicking on the drop-down menu:
f) Next select the Earnings Basis that is also to apply:
- 'Standard Qualifying Earnings' will apply the earnings band lower limit and upper limit as set by the DWP for the tax year in question.
- 'Custom Qualifying Earnings' will allow you to remove these limits and set those that you require, if applicable.

g) Click Save to save your details
Please note: contribution rates and earnings bands are set as a default, meeting the minimum requirements for automatic enrolment. However each one of these is flexible to allow the employer to amend to suit their particular pension arrangements.
3. Assessing your Employees using BrightPay
As soon as BrightPay detects that your automatic enrolment duties have begun, BrightPay will automatically assess your employees for you and determine whether your employees are eligible jobholders, non eligible jobholders or entitled workers.
On-screen flags and yellow alerts will appear to notify you that you now have automatic enrolment duties to perform.
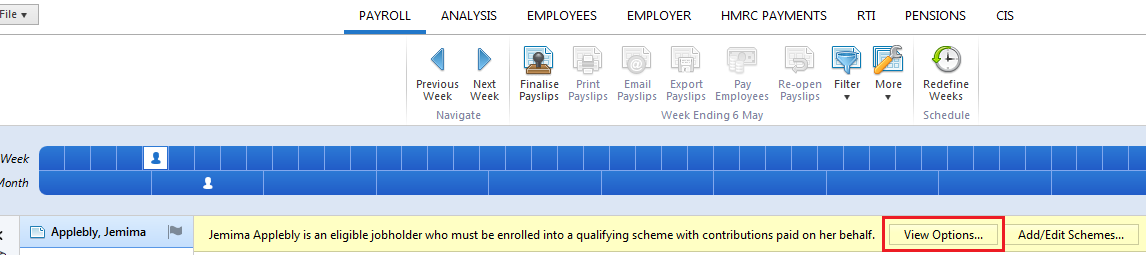
These alerts will bring you through to the various actions available based on the selected employee’s work category by clicking on 'View Options':
4. Enrolling your Employees in BrightPay
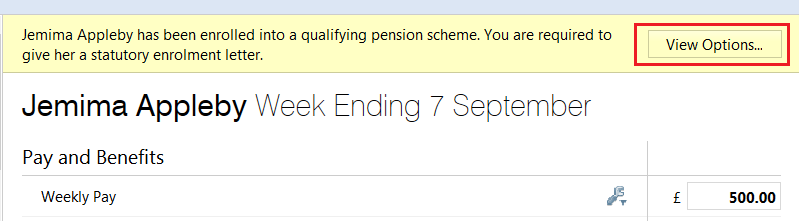
BrightPay will indicate an employee's Eligible Jobholder status on the yellow bar in their payroll screen.
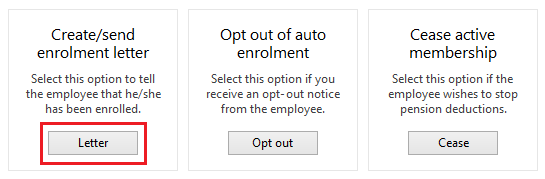
a) Click 'View Options' to bring you through to the various actions based on this worker category:
b) To enrol an eligible employee, simply select Enrol and choose your Aviva scheme from the drop down menu.
c) Tax Relief - choose the tax relief method applicable to your pension scheme. (If unsure, please do check with the pension provider).
d) Click Continue to enrol the employee selected. Alternatively, click 'Enrol multiple employees with these settings..' to batch enrol employees who are to be be enrolled into the same group. The status of each employee selected will be updated to 'Enrolled'.
5. Communicating with your Employees
i) Eligible Jobholders
Once an employee has been enrolled, you must provide them with a statutory enrolment letter. An employee's enrolment letter will include information about:
- their enrolment status
- their date of enrolment
- the Scheme into which the employee is enrolled
- contributions which are now attached to their earnings
- how to opt out should they choose to do so
- general information on how automatic enrolment will benefit the employee
BrightPay will automatically prepare an employee's enrolment letter for you. Once an employee has been enrolled, BrightPay will prompt you to print/ export/ email their enrolment letter:
a) Click View Options followed by Letter:
b) Select Print/ Create PDF/ Email as required. Alternatively, should you wish to batch process your enrolment letters, simply select 'Create/send letter for multiple employees' and your chosen method of communication.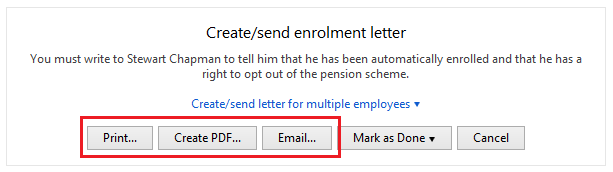
c) Enter a date (if applicable) and the signatory to be added to the letter. If printing or exporting the communication letter, further customisation of the letter is available within the 'Options' menu.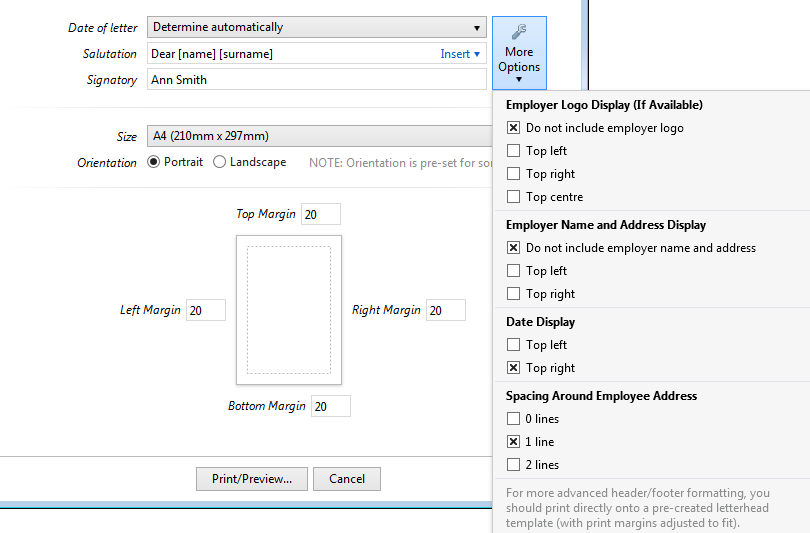
d) Select Print/ Preview/ Create PDF/ Send Email accordingly.
e) Once the employee is in receipt of the enrolment letter, simply 'Mark As Done - For This Employee'. Alternatively, if enrolment letters have been batch processed, select 'Mark As Done - For Multiple Employees':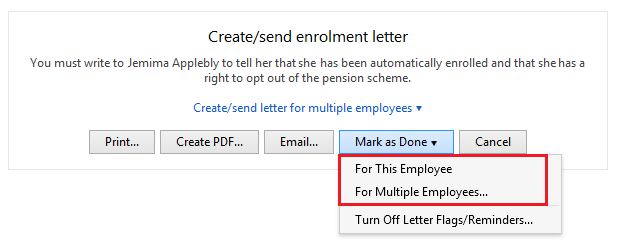
ii) Notifying Non-Eligible Jobholders & Entitled Workers of their right to opt in/ join
Non-eligible jobholders are workers who are not eligible for automatic enrolment but can "choose to opt in" to a pension scheme. Entitled Workers are workers who are not eligible for automatic enrolment but are "entitled to join" a pension scheme.
An employer must provide such employees with information about their right to opt in/join a qualifying AE scheme. BrightPay will automatically prepare these letters for you.
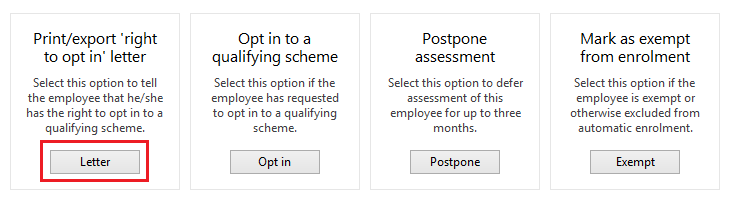
a) BrightPay will indicate an employee's status on the yellow bar in their payroll screen. Where an employee is being assessed as a non-eligible jobholder or an entitled worker, simply click View Options followed by Letter: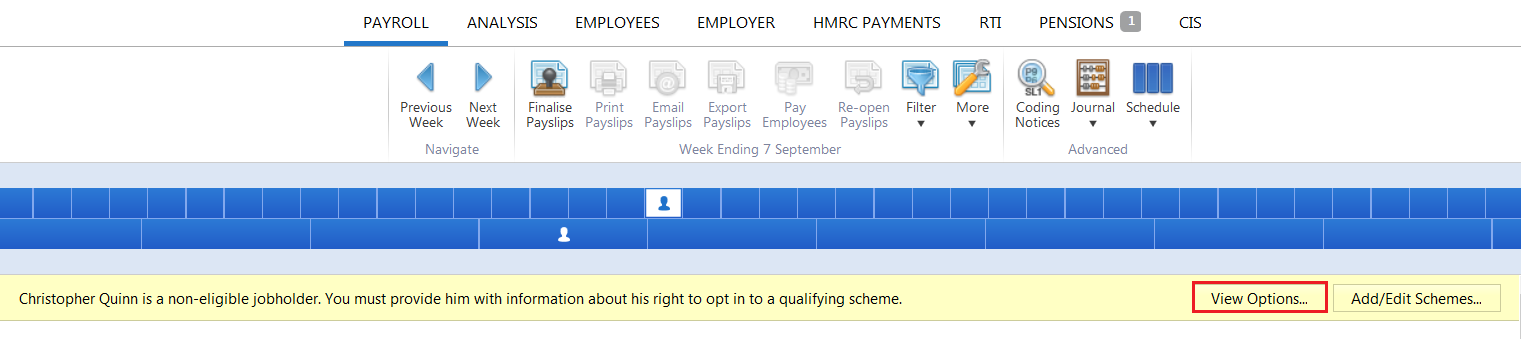
b) Select Print/ Create PDF/ Email as required. Alternatively, should you wish to batch process these letters, simply select 'Create/send letter for multiple employees' and your chosen method of communication.
c) Enter a date (if applicable) and the signatory to be added to the letter.
d) Select Print/ Preview/ Create PDF/ Send Email accordingly.
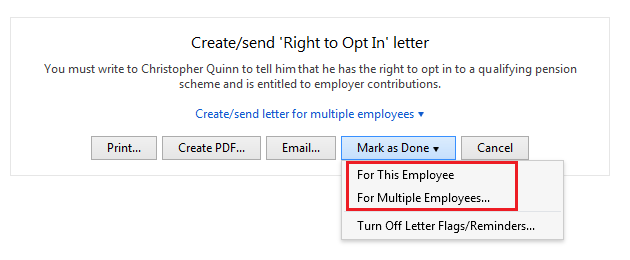
e) Once the employee is in receipt of the right to opt in/ right to join letter, simply 'Mark As Done - For This Employee'. Alternatively, if enrolment letters have been batch processed, select 'Mark As Done - For Multiple Employees':
6. Postponing Employees in BrightPay
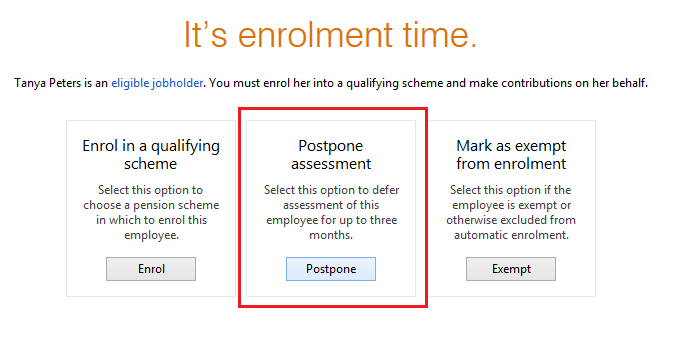
You can use postponement to delay automatic enrolment for some or all employees for up to three months.
a) To postpone an employee, click 'View Options', followed by Postpone:

b) Enter the assessment date and deferral date applicable to the employee. Click Continue to postpone the employee selected. Alternatively, click 'Postpone assessment until the date entered for multiple employees...' to batch postpone employees who are to be postponed to the same date.
BrightPay will validate the date entered to ensure that it is no more than 3 months from the duties start date.
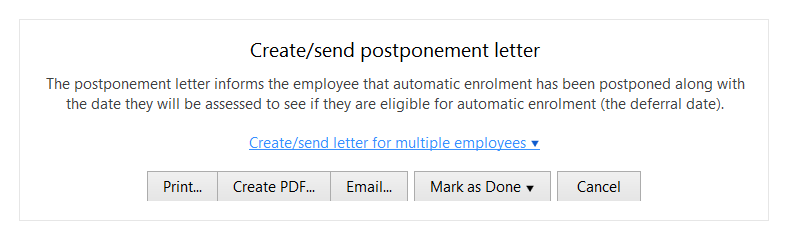
c) If postponement is used, you must provide the employee with a statutory postponement letter which BrightPay will automatically generate for you to give or email to the employee. Simply click Print/ Create PDF/ Email as required. Alternatively, should you wish to batch process your postponement letters, simply select 'Create/send letter for multiple employees' and your chosen method of communication.
d) Enter the date (if applicable) and signatory to be added to the letter:
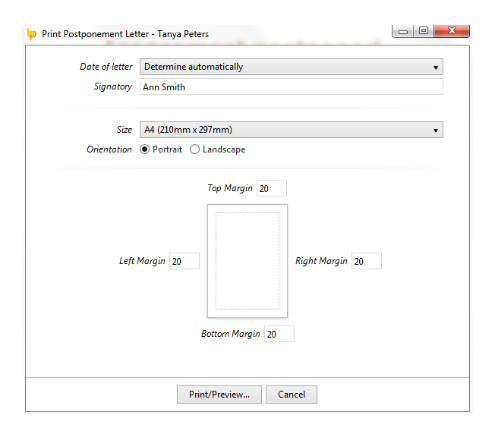
e) Select Print/ Preview/ Create PDF/ Send Email accordingly.
f) Once the postponement letter has been given or emailed to the employee, simply 'Mark As Done - For This Employee'. Alternatively, if postponement letters have been batch processed, select 'Mark As Done - For Multiple Employees':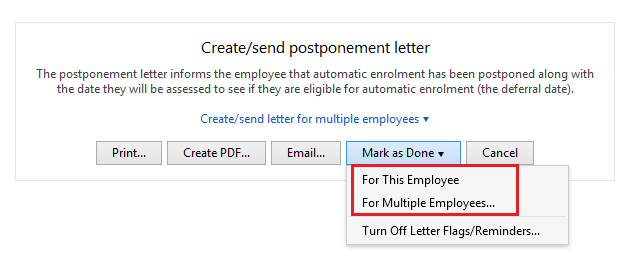
7. Processing Pension Contributions
Once employees have been enrolled, have joined or opted-in, their pension deductions will automatically be applied to their payslips going forward. The deduction applied to the payslip will be made in accordance with the contribution rates and earnings bands selected when setting up the pension scheme in BrightPay.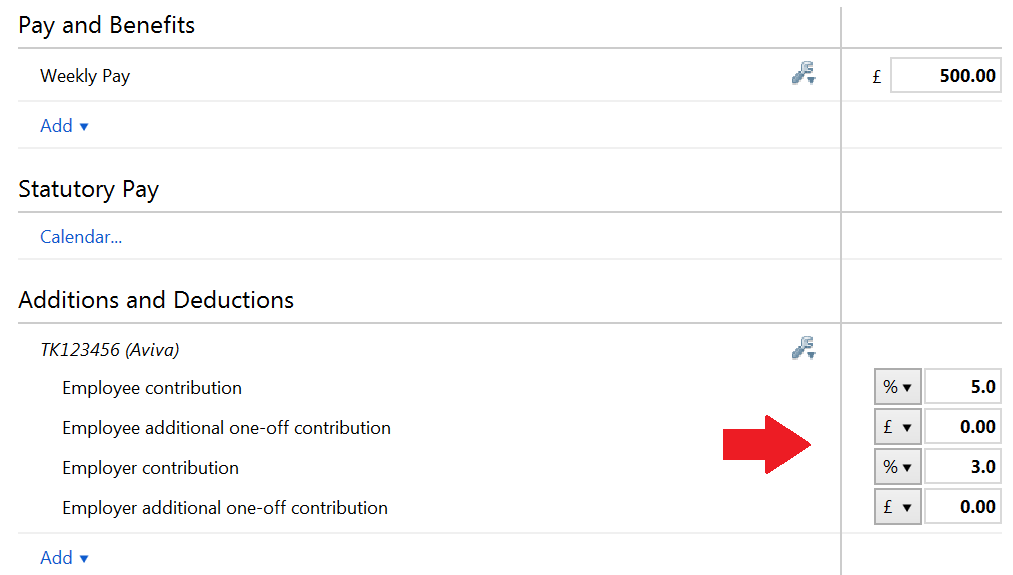
Please note: if tax relief is at source, then the employee contribution will be adjusted by 0.2%.
On finalising payslips, their pension deductions will also be reflected on their payslip:
8. Submitting your Enrolment & Contributions Data to Aviva using API
BrightPay will automatically produce your enrolment file and each tax monthly contribution file that Aviva require for submission.
Aviva offer an API option which will allow you to submit your enrolment file and subsequent contribution files directly from BrightPay into Aviva. This works very similarly to RTI where you just click one button and the submission is made.
- To use the API option, within the Pensions utility, simply select Aviva on the menu bar and select ‘Aviva API Integration’ as your submission method, followed by ‘Save Changes’.
1) To submit your enrolment file using API, select ‘Enrolment Summary’ and click ‘Send enrolment submission’. 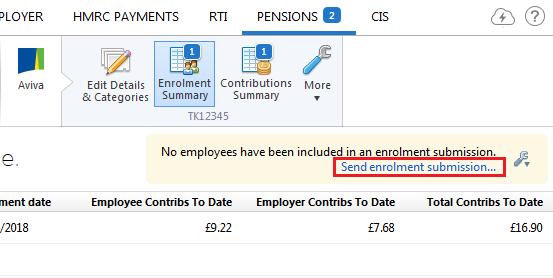
- Complete each step accordingly and at the prompt, click ‘Send Now’.
- Enter your Aviva login details to complete the submission process. Similar to RTI, you will subsequently receive confirmation that Aviva has received your file at the top right of your enrolment summary screen.

2) Likewise, to submit an Aviva API contributions file each tax month, select Contributions Summary on the menu bar and click ‘Send submission’.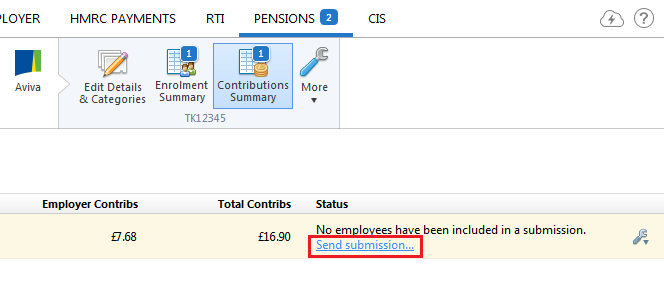
- Select the tax month that you are submitting for and complete the screens that follow accordingly. At the prompt, click ‘Send Now’. Ensure your Aviva login details are entered on the next window in order to complete the submission process.
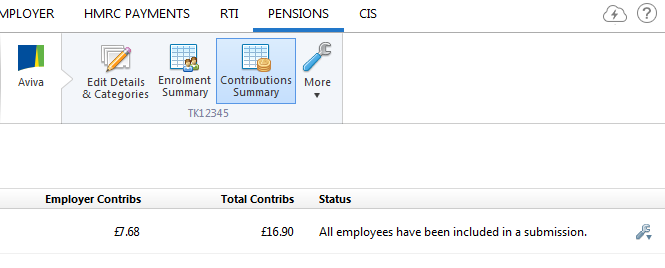
- Again, you will receive confirmation back into BrightPay that Aviva has successfully received your contributions information.
Please note: only one contributions file is to be submitted each tax month, even if you pay your employees more frequently than this (e.g. weekly) or pay employees across more than one pay frequency. BrightPay will automatically create and update the contributions file relevant to the pay periods which fall in each tax month. The user must thus ensure the contributions file isn't submitted too early (that is, before all pay periods across all pay frequencies falling in the tax month have been finalised).
9. Submitting your Enrolment & Contributions Data to Aviva using CSV
BrightPay also facilitates the creation of Aviva's enrolment file(s) and subsequent tax monthly contributions files in CSV file format. This is an alternative to using the API option and is most suited to those users who are not responsible for submitting the pension files directly themselves, but instead need to forward the pension files on to someone else for submission (e.g. a payroll bureau sending these on to a client for them to submit themselves).
- To use the CSV option, within the Pensions utility, simply select Aviva on the menu bar and select ‘CSV file upload’ as your submission method, followed by ‘Save Changes’.
1) To create an enrolment file in CSV file format:
a) Click into the Pensions utility and select Aviva on the menu toolbar
b) Select Enrolment Summary, followed by Create Enrolment CSV File...

c) At step 1, select the employees you wish to include in your enrolment file. Click Next.
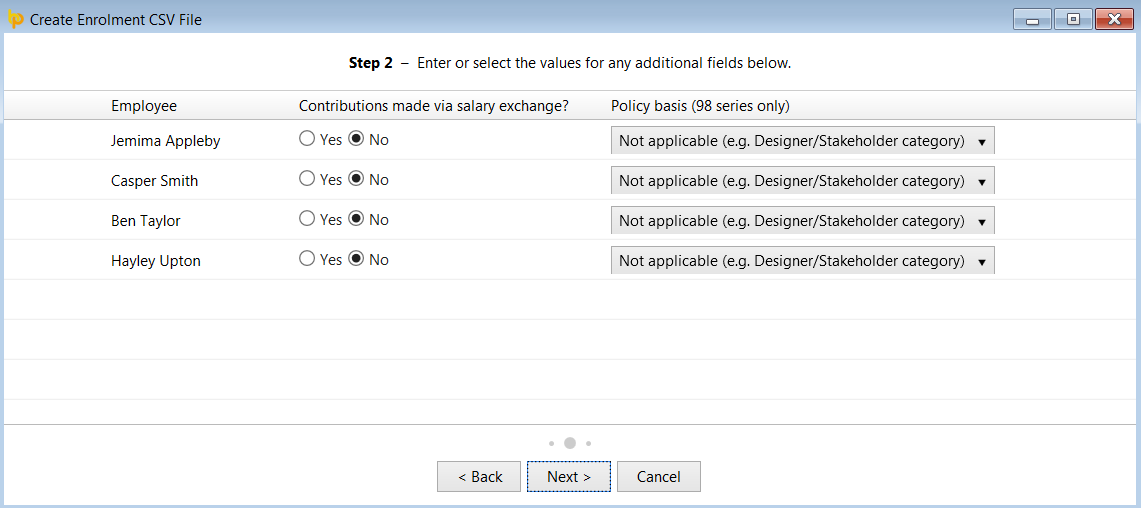
d) At step 2, enter additional employee details as required. Click Next.
e) At step 3, simply click ‘Save File..’ Save the file to a location of your choice, ready for upload into the Aviva portal.
2) To create a tax monthly contributions file in CSV file format:
a) Within the Pensions utility, select Contributions Summary on the menu bar, followed by Create CSV File...
b) Choose the Tax Month period which you would like to create the CSV file for. Click Next.
c) At step 2, select the employees you wish to include in the contributions file. Click Next.
d) At step 3, for applicable employees, select a reason for partial or non-payment of contributions. For example, if an employee has left your employment, select 'No further contributions payable' to inform Aviva to no longer expect contributions for this employee. Click Next.

e) At step 4, simply click ‘Save File..’ Save the file to a location of your choice, ready for upload into the Aviva pension portal.
Please note: only one contributions file is to be submitted each tax month, even if you pay your employees more frequently than this (e.g. weekly) or pay employees across more than one pay frequency. BrightPay will automatically create and update the contributions file relevant to the pay periods which fall in each tax month. The user must thus ensure the contributions file isn't submitted too early (that is, before all pay periods across all pay frequencies falling in the tax month have been finalised).
10. Ongoing Assessment of Employees
After your duties start, BrightPay will continue to monitor your employees for you and will alert you when you have further AE duties to perform.
Examples of when you may have further duties to perform are:
- a new starter commencing employment with you
- an existing employee now with earnings above the earnings trigger for automatic enrolment
- an employee turning 22 (with qualifying earnings)
- when a postponement period ends and an employee is re-assessed
Need help? Support is available at 0345 9390019 or [email protected].