Importing from IRIS Bureau - using a CSV File
Please note: this support documentation is for users moving from IRIS Bureau only.
BrightPay facilitates the importing of employee information in CSV format from IRIS Bureau.
A CSV import of both employee and their mid-year pay information can be performed in BrightPay at any point in the tax year.
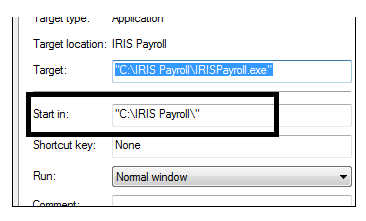
1. First check the location of your IRIS installation. To do this, right click on your IRIS Desktop icon and select “Properties”. The location can be seen in the “Start in” box.
This is normally C:\IRIS Payroll:
2a) To export your employee information (and year-to-date pay information to date if migrating mid tax-year) from IRIS, first download the 'I1998.IMP' file by clicking here
The I1998.IMP file contains the required layout for the CSV file to import in to BrightPay.
2b) Click the 'Download' button on the page that will load for you: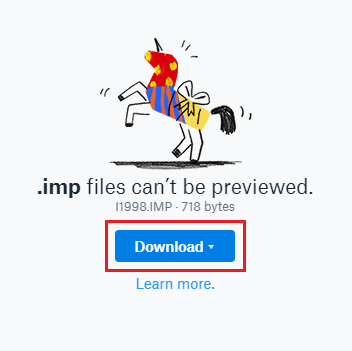
2c) Save this file to your IRIS installation folder, as ascertained in step 1:
If using Internet Explorer:
i) Click the dropdown arrow on the 'Save' option and select 'Save as':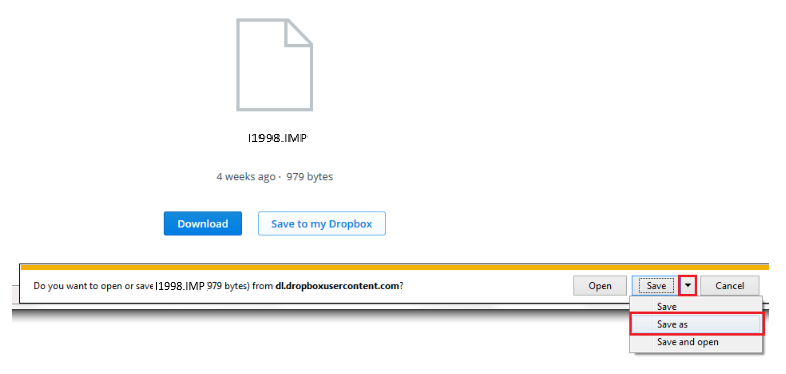
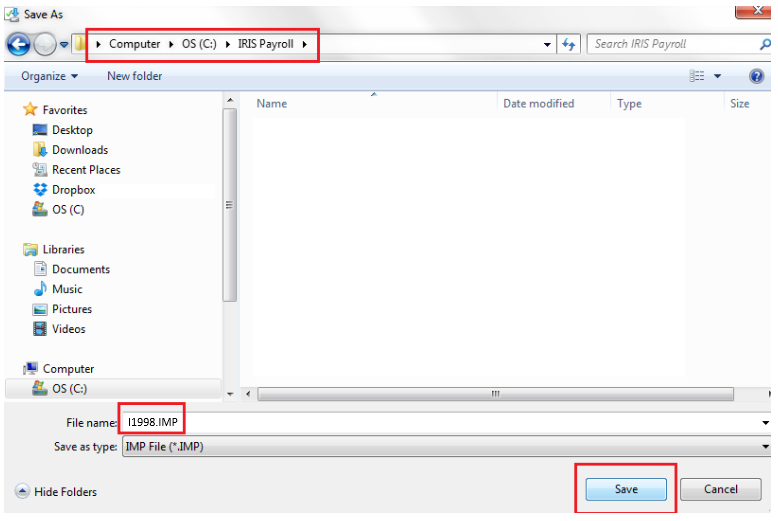
ii) Browse to the location of your IRIS installation folder as ascertained in step 1 and click 'Save':
If using Mozilla Firefox:
i) Select 'Save File' and click 'OK':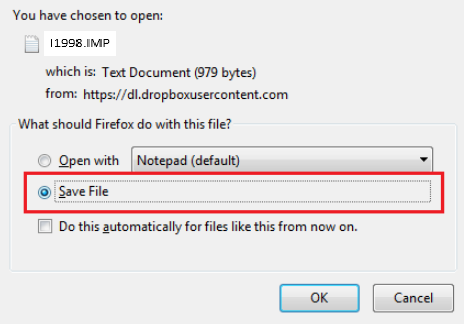
ii) Browse to the location of your IRIS installation folder as ascertained in step 1 and click 'Save':
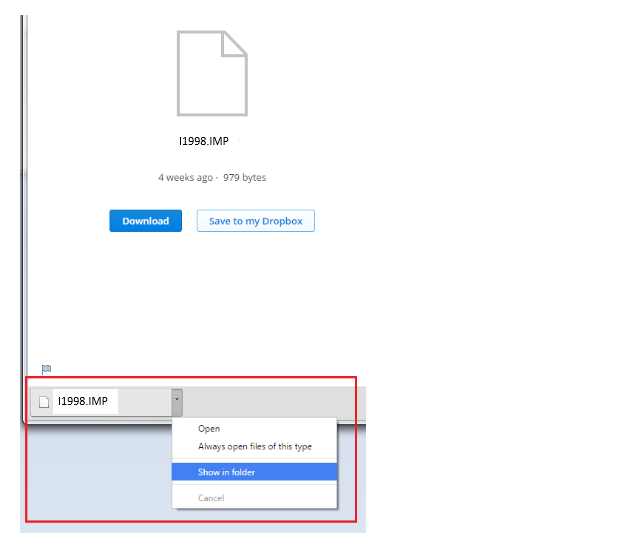
If using Google Chrome:
i) Click the dropdown arrow next to the file download and select 'Show in Folder':
ii) Right click the I1998.IMP file and left click on 'Copy':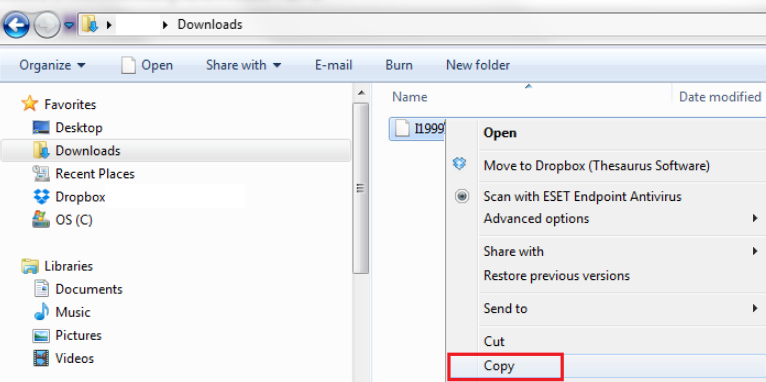
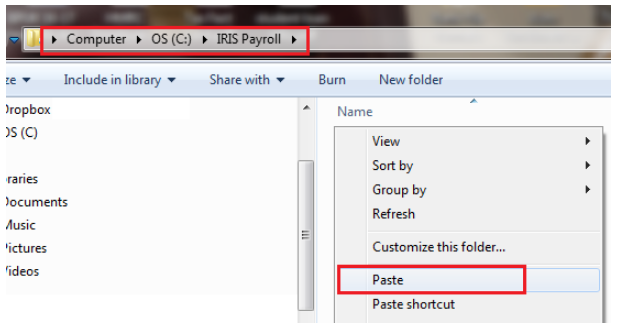
iii) Now browse to the location of your IRIS Payroll installation as ascertained in step 1. Open the folder and right click with your mouse. Left click on 'Paste' to save your I1998.IMP file into this folder:
3. Once the 'I1998.IMP' file is saved in to your IRIS installation folder, open your IRIS software and go to File > Import/Export > Export Data: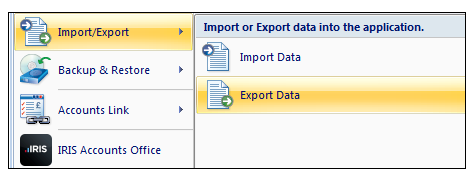
4. Select “Payroll Data Export” from the list: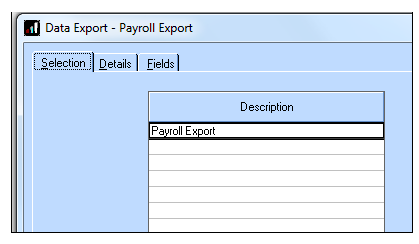
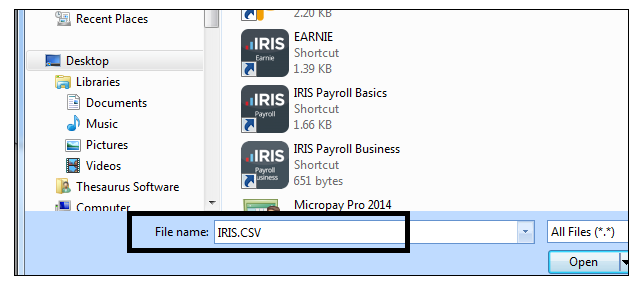
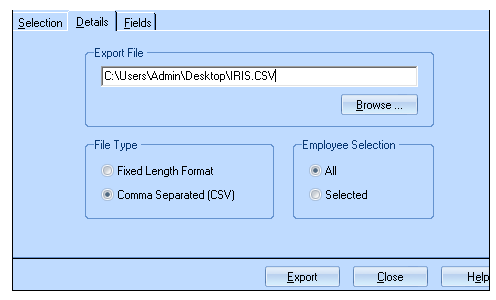
5. In the “Details” tab, choose a location for your file by pressing the Browse button, e.g. Desktop, so that it can be found easily when importing. Enter the name IRIS.csv in the file name box and press Open.
(Calling the file IRIS.csv is required so BrightPay knows the CSV file has come from IRIS)
6. Once complete, click the Export Button:
Important note: Do not open the CSV file, as Excel will format items such as sort code and account numbers and they may no longer be importable into BrightPay.
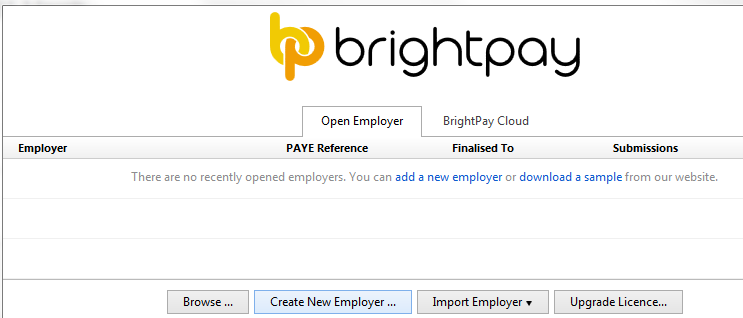
7. Open BrightPay and 'Create New Employer':
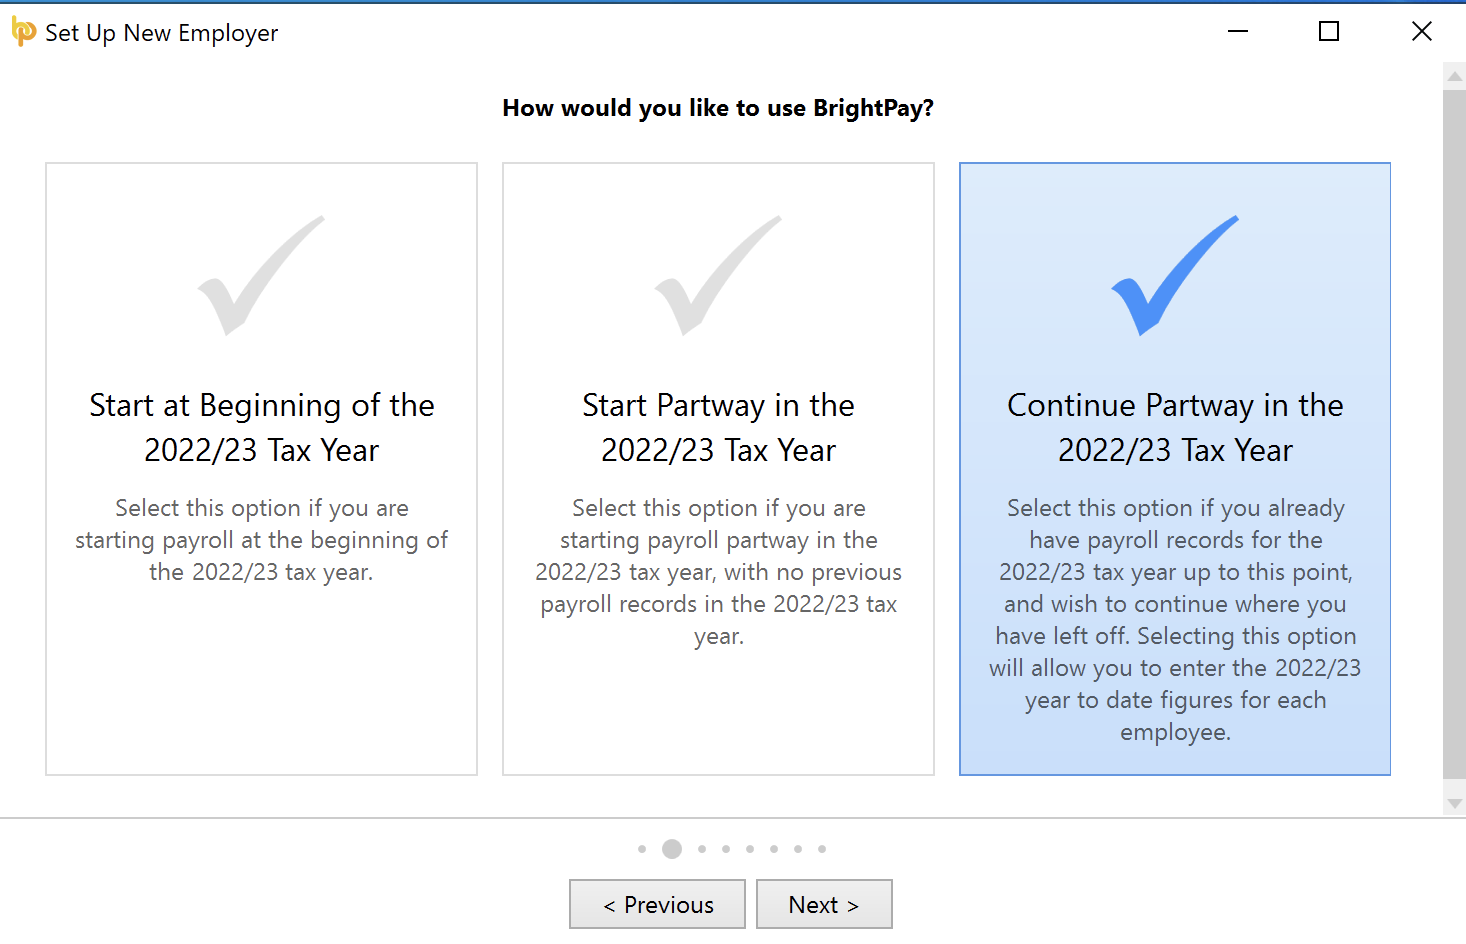
8. Select how you wish to use BrightPay:
If you wish to import employee information at the start of the tax year, select 'Start at Beginning of the Tax Year'.
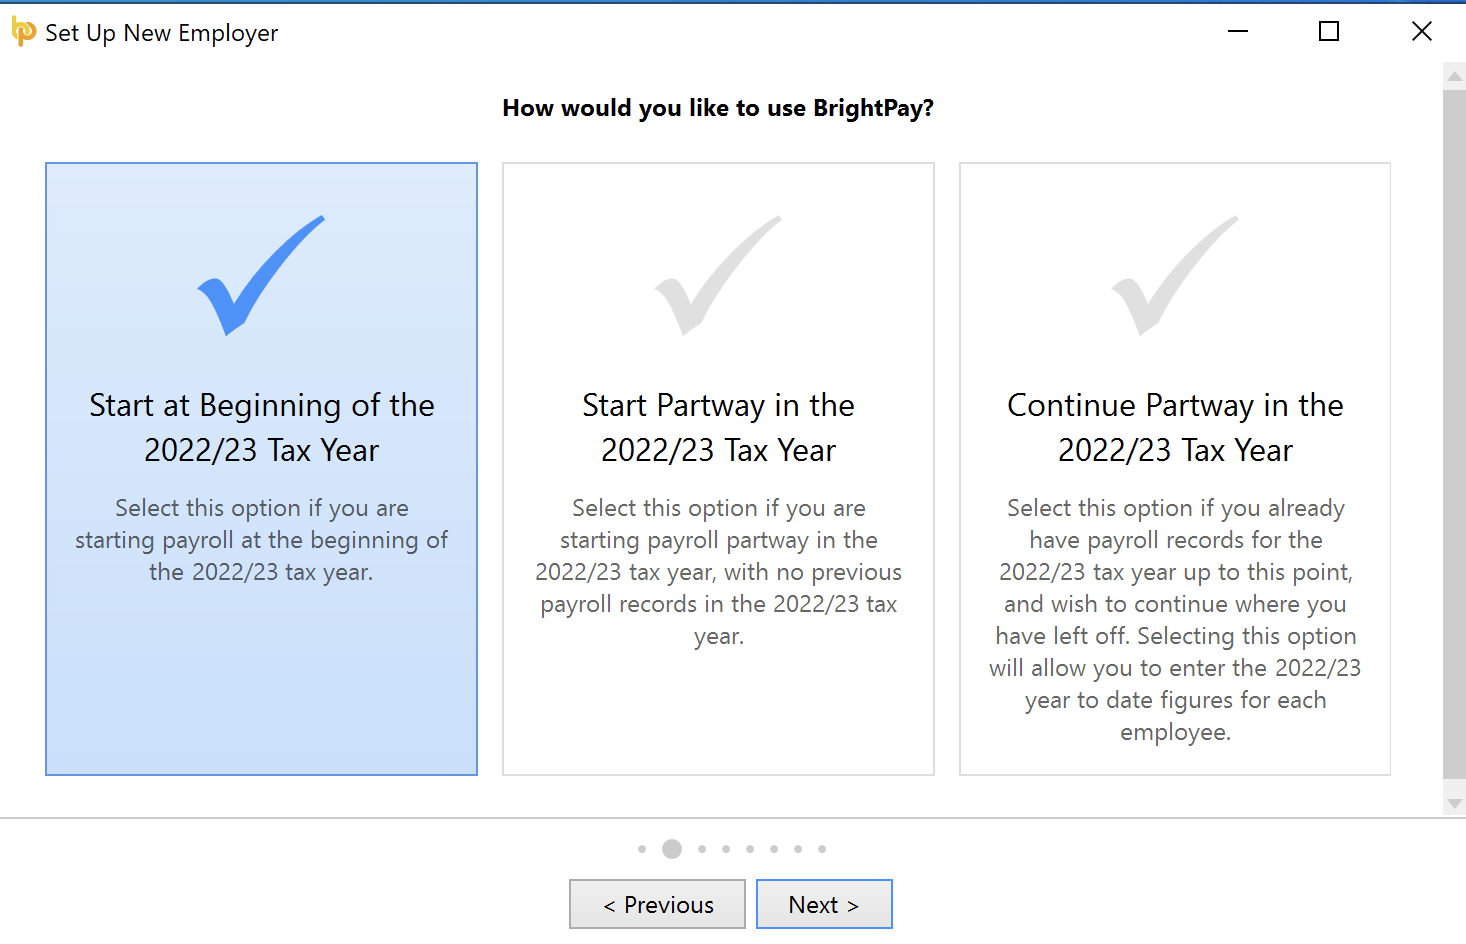
If you have already processed payroll in your previous software for the current tax year and wish to import year-to-date pay amounts as well as your employee information, select 'Continue Partway in the Tax Year'.
9. Complete each screen accordingly with your relevant employer information.
For further assistance with this, please see our support section on Adding a New Employer
10. Once you have entered and saved your employer information, go to 'File > Import/Export Data > Import Employees from a CSV file'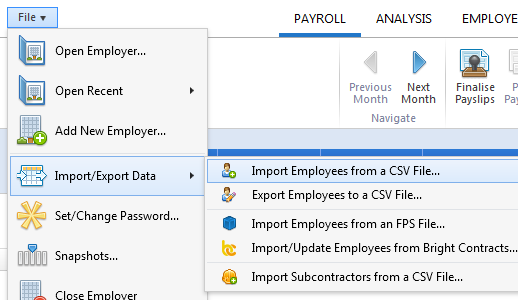
11. Browse to the location of your IRIS CSV file, select it and press 'Open'.
12. BrightPay will ask you to confirm that this is an IRIS file - click Yes to confirm this.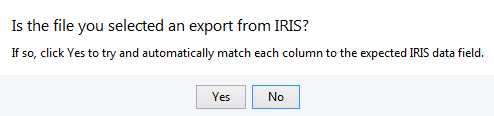
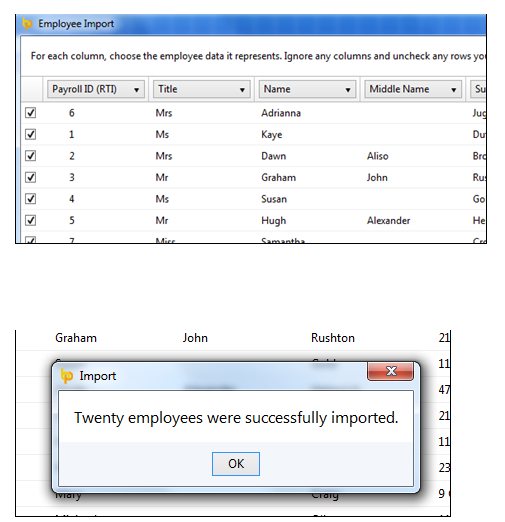
Your employee information will be displayed on screen. BrightPay will automatically match up your column information.
13. Untick the header row as well as any rows you do not wish to be imported. Click 'Import' to complete the import.
Following the import, further employee information can be manually entered within 'Employees', if required. Alternatively you may wish to update missing employee information using CSV file.
It is also recommended that all employee details are reviewed before processing any payroll to ensure information imported in is correct and applicable for the tax year in question.
If you have migrated to BrightPay mid-year, any mid-year cumulative pay information imported in via your CSV file can also be viewed here in each employee’s ‘Mid-Year Totals’ section.
After reviewing your employee information, simply click the 'Payroll' tab to commence processing payroll.
Need help? Support is available at 0345 9390019 or [email protected].